手順
※画面はWindows 10 22H2です。
プログラムの一覧から「切り取り&スケッチ」を選択します。

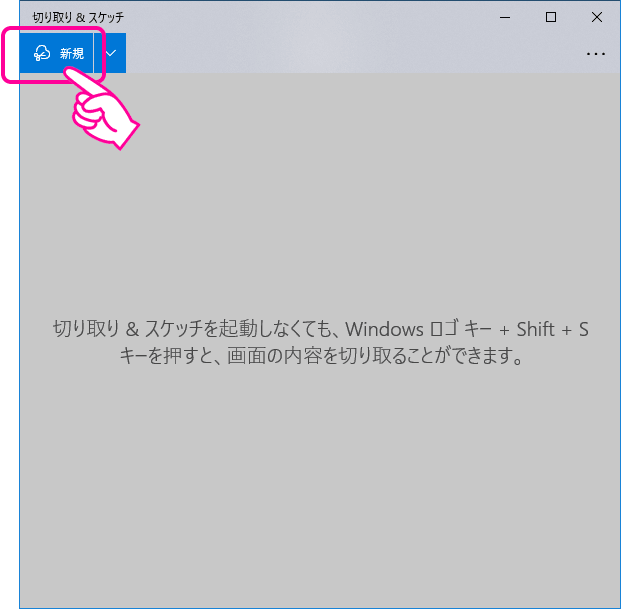
左上の「新規」をクリックします。
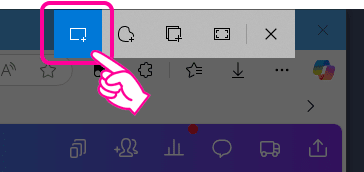
画面全体が暗くなり、画面上部にいくつかのアイコンが表示されます。
左側の四角の右下に「+」があるアイコンをクリックします。
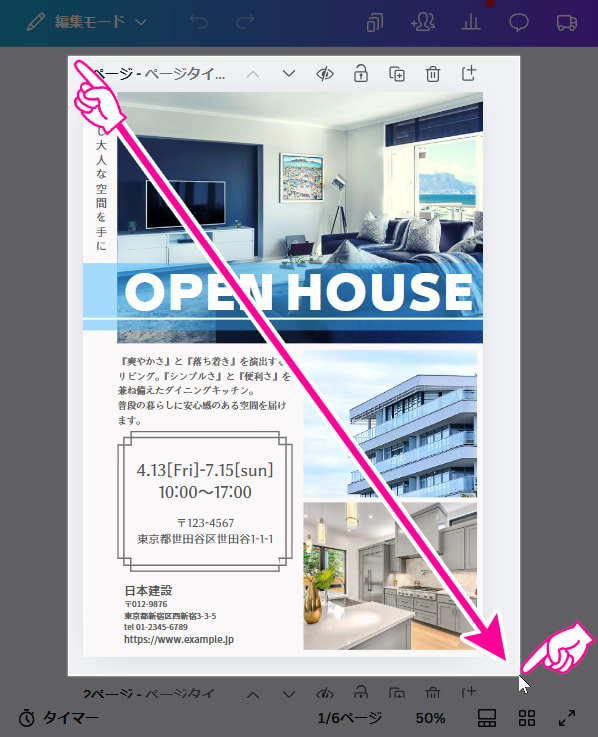
スクリーンショットを撮りたい部分を斜めにドラッグします。対象となる部分は明るくなります。
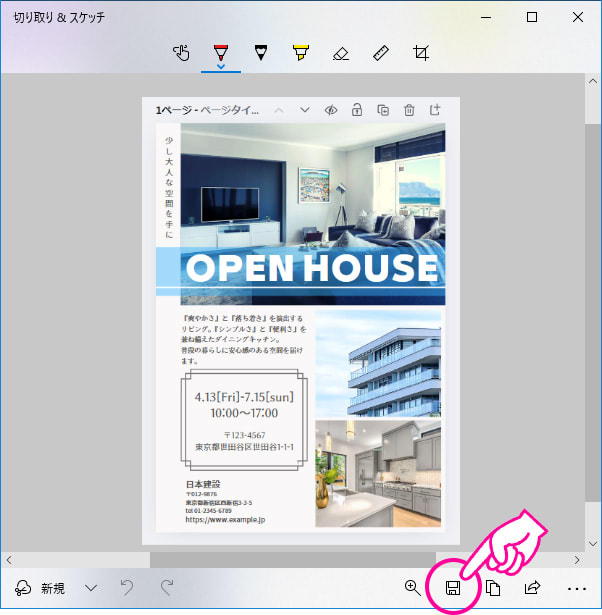
クリックし終わると「切り取り&スケッチ」の画面にスクリーンショットが入ります。
画面下部にあるフロッピーディスクのアイコンをクリックしてファイルの保存をします。
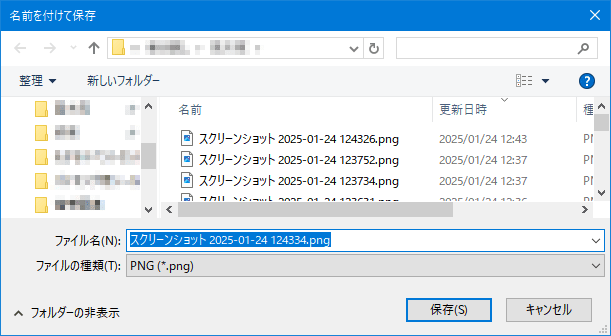
「名前を付けて保存」の画面でファイルの保存先やファイル名を入力して「保存」ボタンをクリックします。
スクリーンショットの保存は以上です。